Create a new Whitelist or Blanketblock
What is the difference between a Whitelist and a Blanketblock?
- A Whitelist is a set of domains/URLs a user will always be allowed to access, no matter the content of the site.
- A Blanketblock is a list of domains/URLs the user is allowed to access if those sites are allowed by the category filtering rules for that device.
See this page for more details and a diagram showing how a blanketblock works.
Example: You could create a Blanketblock containing one item: amazon.com. The user in that case could access no other website than amazon.com, but only the content from amazon.com that was allowed by their category filtering rules. If "Books" or "Movies" categories are blocked in your settings, the user could still access Amazon, but not listings about books or movies. By contrast, if you were to add amazon.com to a Whitelist, all the pages on Amazon would load, regardless what the page was about.
When is a whitelist a good tool?
- You want to restrict a computer to a limited set of sites containing no content that needs to be filtered. Examples: A shipping station computer might be limited to FedEx, UPS, etc. A shop computer might be limited to selected web-based software platforms for your business, such as accounting, design, ERP, parts lookup, etc.
When is a Blanketblock a good tool?
- You want to limit a user to a set of websites, some of which may need further filtering because of the wide range of content on them. Examples: eBay, Amazon, Walmart, etc. (A Blanketblock is generally the more flexible and useful option.)
How to Create a Whitelist or Blacklist
1. Create a custom category for the whitelist.
- Content Filter > Categories > Categories > ACL Categories > Click
+sign to create a new ACL Category - Fill out the form
- Code (must be unique within the company) example:
laptop_whitelistorlaptop_blacklist - Name - can be the same as the Code above
- Company - select the correct Company that this category is being built for
- Code (must be unique within the company) example:
- Click
NEXTor click on the Action button on the LH side - Action = ACL activate via action group
- Invisible = No
- Click
NEXTor click on thePolicy / Permissionsbutton at the left side - Select whether or not this policy is being required by the Accountability Policy
- Click
NEXTorSAVE. Now the blank category should be displayed on your screen. - Add at least one pattern (website URL) to this category that you just created
- Click
Add Pattern> add the website URL (example: deere.com) and click Save
- Click
2. Use the category in a new Access Policy.
Return to Content Filter on the left side of the DB Console
- Content Filter > Web Page Access > Company Access Policy > click
+sign to create Access Policy > A Single Company >- Name = can be same as the name of the category you created above
- Company - select the correct Company that this Access Policy is being built for
- Policy / Permissions tab
- Select whether or not this policy is being required by the Accountability Policy.
- Devices Tab
- select the appropriate device group'
- Actions = add the Category you created above and set the Action to:
WhitelistorBlacklist - Times tab - nothing required here
- Apps tab - nothing required here
-
SAVE
Now go back to this Company's Access Policy Dashboard and you should see this new policy in the list.
How to build a Blanketblock
1. Create a new category for the Blanket Block
- Content Filter > Categories > Categories > ACL Categories > Click
+to create a new ACL Category - Fill out the form
- Code (must be unique within company) example: default_blanketblock
- Name (message displayed on the block page) Example: "This website is not in your list of allowed sites."
- Action = ACL activate via action group
- Invisible = No
- Add at least one pattern (website URL) to this category that you just created
2. Use the category in a new Access Policy
Go back to Content Filter again
- Content Filter > Web Page Access > Company Access Policy > click
+sign to create Access Policy > A Single Company >- Name = default_blanketblock
- Actions = add the Category you created above and set Action = Blanketblock
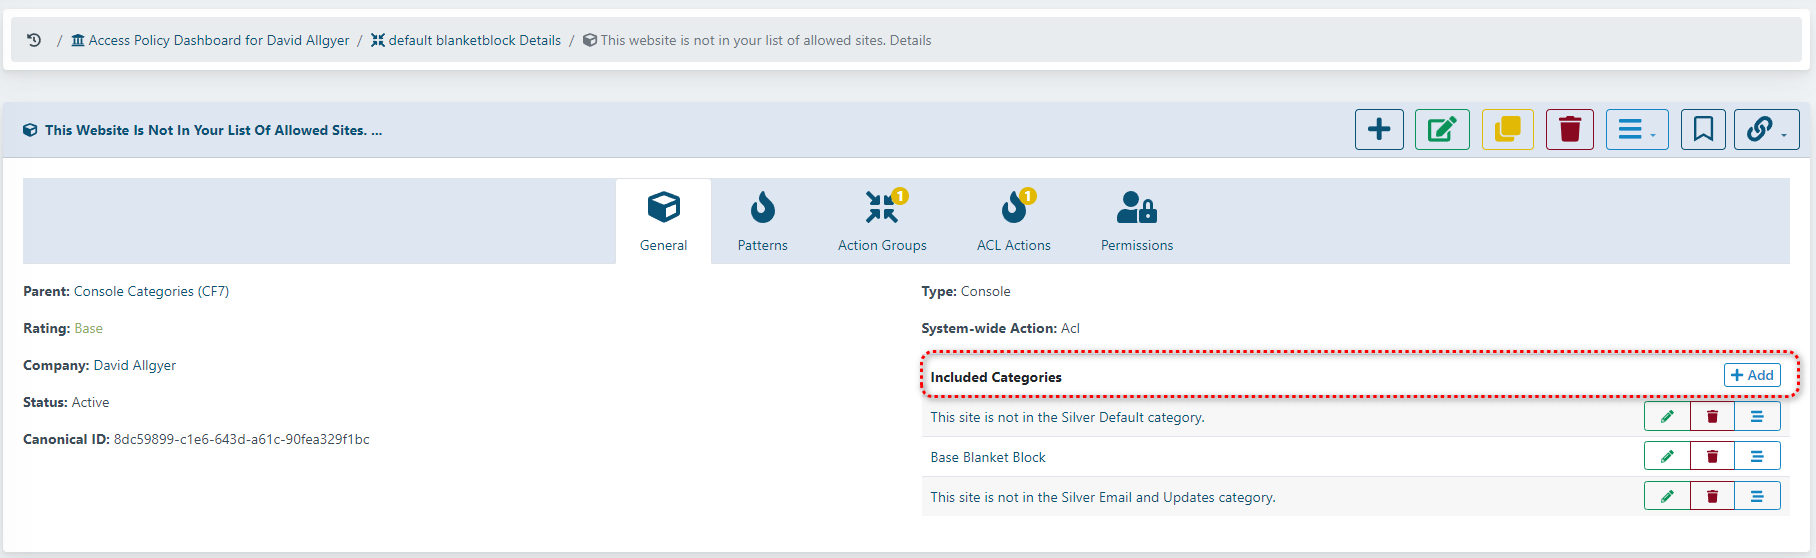
- For the Blanketblock to properly function, an Included Categories needs to be set: