
Setting up Calendar/Contact Sync in Daystar Email
Google or iCloud account owners enjoy seamless syncing of their mail, calendar, and contacts across their signed-in devices. With a few simple setup steps, Daystar users can have the same benefits.
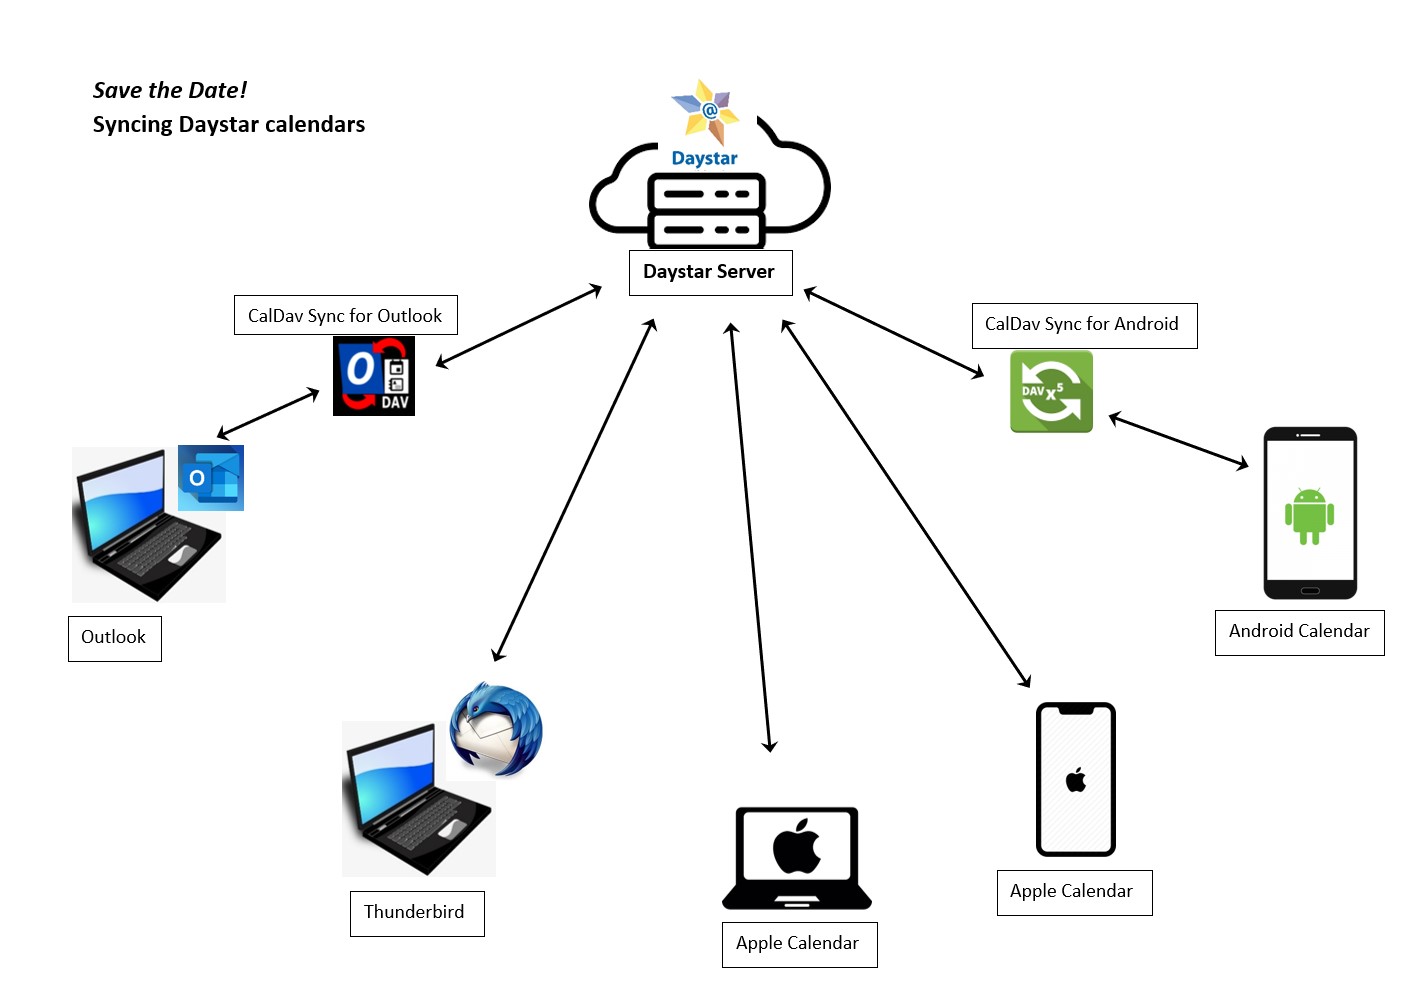
Server-Client model
Like Daystar email data, Calendar & Contact data is always stored on the Daystar server and accessed or synchronized by a client. Think of the client as a program for accessing your data. If the device you're using for email or calendars gets lost, you can always log in to the Daystar server from another device and all your data is still there.
Frequently, calendars and contacts are included in the email client itself. On mobile devices, there may be separate Calendar or Contacts apps.
How to Access your Calendar Data
- Webmail --You can always access your calendars and contacts by logging in to your Daystar account via the web portal at https://mail.daystar.io
- Standard Email Programs --Use the calendars built into Thunderbird, Outlook, or Apple Mail.
- Calendar apps --Use calendar apps such as Vision Calendar, Apple calendar, Any-Do, Fantastical, etc.
Restricted hotspot users: If port 443 is blocked, use the alternate port 59367 by adding it after the domain name to the URLs shown below in your client to enable sync access. The beginning of the URLs will then look like this https://mail.daystar.io:59367/SOGo/dav/
Step 1: Configure a calendar on your Daystar account
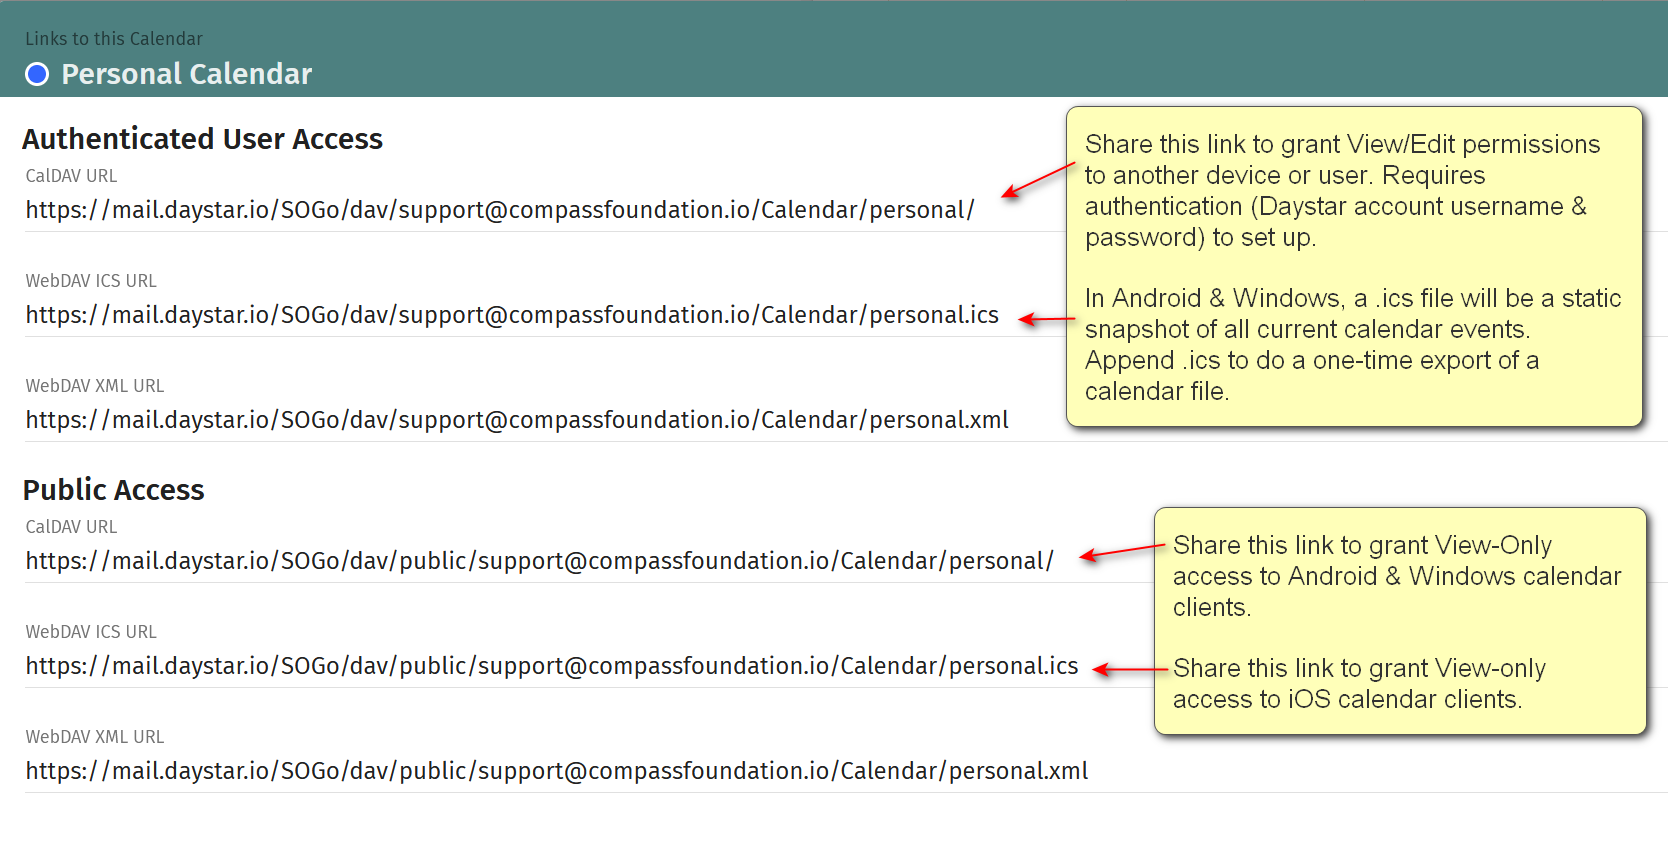
A. Sign in to https://mail.daystar.io with your username (full email address) and password. Select the calendar icon at the top right.
B. In the left margin you will see Personal Calendar. Use the kabob menu (3 vertical dots) to name & customize
C. Use the plus symbol to add additional calendars for business or shared family calendars, etc, as desired. Use the colorized Toggle on each calendar to Show/Hide the data from that calendar.
Step 2: Configure a Calendar Client
A. Thunderbird
- From the left bar menu, select Calendar, then
+to add a new calendarOn the Network. - Enter your Daystar username (full email address), and for
Location, entermail.daystar.io. - Click
Find Calendars, then enter your Daystar password when prompted. (If no calendars are discovered, go back to Step 2 and paste the CalDAV URL you copied above for Read-Write sync into the "location" field.) - Click
Subscribe, and your Daystar calendar should be ready for use. You can repeat this process on other devices and have your calendar data synced across all devices.
B. Calendar in iOS
- The process is very similar to that for Thunderbird. Provide you Daystar username (full email address) and password when required, but use the
WebDAV ICS URLfor the calendar link instead of the CalDAV URL.
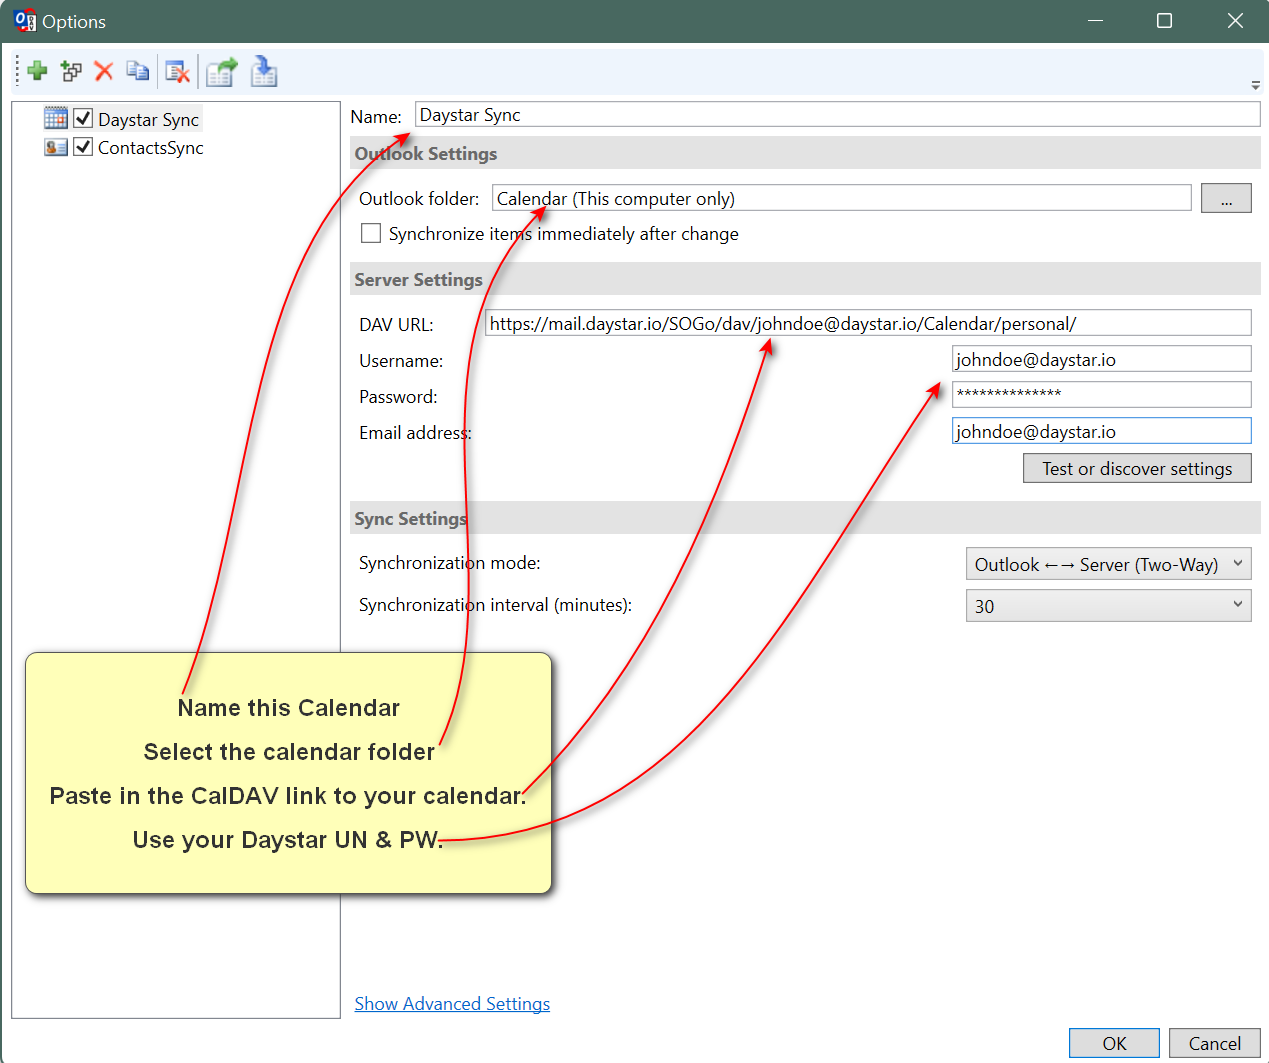
C. Microsoft Outlook
- Download and install the CalDAV Sync Plug-in for Outlook
- Add a New Sync Profile. Select
SOGofor Profile type. Configure your Daystar details.
D. Android Calendar
- From Google Play or alternate appstore, download and install the
DAVx5app.

- From your Android Calendar app, select
Add CalDAV calendarand login with your Daystar username (full email address) and password. - Create account in DAVx5 as prompted, or simply choose defaults to sync your Daystar calendar(s).

Syncing Contacts across Your Devices
The process for Contacts is very similar. Start in mail.daystar.io if necessary to set sharing permissions.
- In Thunderbird, go
New Address Book/Add CardDAV Address bookthen sign in with Daystar username (full email address) and password and it's done! - In Outlook, build a
Contact Sync Profileas you did above for Calendar. - In Android, sign in to Daystar account via your DAVx5 app if you did not check
Contact Syncwhen you set up your calendar.