General Knowledge Base
Information about networking-related items of interest.
- Splashtop Business Access SNI Support
- Windows Networking Tips
- Windows Update tips
- Preparing your Windows Server for AD LDAPS access
Splashtop Business Access SNI Support
Splashtop Business Access is a remote desktop application.
Problem (Windows devices)
As of this writing, SSL/TLS Server Name Indication (SNI) is not enabled by default by the Business Access software for Windows, therefore, Splashtop traffic appears to the DrawBridge as just the destination IP address instead of the domain name, resulting in interception, and, as the encrypted traffic is either not HTTP, or is using certificate pinning, the remote desktop connection fails to complete, and the session initiation fails.
Solution
- Ensure the Splashtop software is fully up-to-date.
- Using the Registry Editory, add the following Registry key to any computer running the Splashtop Business Access / Streamer app:
Path:HKEY_CURRENT_USER\Software\Splashtop Inc.\Splashtop Remote Client for STB
Right-click in the list view for that directory and add a new DWORD value:
Name:EnableSSLSNI
Type:REG_DWORD
Value:1
(1= Enable,0= Disable)
- Restart the computer for good measure, then verify the remote connection now works as expected.
Example
Screenshot of the new value added above shown in context of other data in the same directory. Note that surrounding key/value data may vary per installation.

Windows Networking Tips
Reset Windows Network stack
Here's a list of commands to reset the Windows network stack.
Note that you need to do this at a Command Prompt that is running as Administrator.
Also note that some may not apply to all versions of Windows. If a particular command doesn't apply, you'll just get an error message, which can be ignored.
ipconfig /flushdns       #clears the system DNS cache
nbtstat -R
nbtstat -RR
netsh int ip reset all   #reset the TCP/IP stack to Windows install defaults
netsh winsock reset      #resets the Windows network sockets catalog
route /f                 #flush the routing table
ipconfig /registerdns    #renew DNS client registration and refresh DHCP leases
NOTE: A reboot will be required after performing these aggressive operations!
Release/Renew Windows DHCP address, with time delay
If you need to change the subnet that a Windows device is on, but need some time between releasing and renewing the address, the following command will have a 45 second delay between the two commands.
ipconfig /release && TIMEOUT /T 45 && ipconfig /renew
Local NETBIOS/WINS/Filesharing/Printer names not resolving
Windows File sharing can be finicky. (Example: QB company file access across the network suddenly stops working)
- Make sure the Network you're on is designated as a Private network, not a Public one (a Public network profile has a stricter firewall ruleset). IF you change it, go ahead and reboot, and then try your Content Filter again
- When trying to diagnose these types of issues, be aware that commands
ping,nslookup, and Windows file sharing all seem to work slightly differently.
Explanation
nslookup wolfman(name server lookup: wolfman) sends the hostname (wolfman) to the DNS (domain name system) to obtain the corresponding IP address. This is the sole purpose of thenslookupcommand. This works already, so we have verified that the DNS works and that wolfman indeed corresponds to an IP address.In contrast,
ping wolfmanneeds to do two things:
- Get the IP that the hostname (wolfman) corresponds to
- Send packets to the IP and listen for the response
On Windows (even recent versions such as Windows 10), the first step can easily fail. For the sake of backwards compatibility, Windows supports various methods of hostname resolution (hosts file, DNS, NetBIOS/WINS, LMHOST file).
Unfortunately, it seems that Windows' ping command doesn't always attempt a DNS lookup. I don't know the specific conditions that triggers this behaviour.
Fortunately, we can force Windows to do a DNS lookup by using a FQDN (fully qualified domain name). In practice, we do this by suffixing a
.dot to the hostname:wolfman.. Try pingwolfman.and verify that it works.Source: StackExchange thread
- Also note that printers are sometimes set up with a WSD port. In some cases, this "intelligent" auto-discovery service doesn't seem to update as expected. It may be quicker to remove and re-add the printer than to wait on WSD to get up-to-speed.
Web Services for Devices allows network-connected IP-based devices to advertise their functionality and offer these services to clients by using the Web Services protocol. WSD-based devices and clients communicate over the network using a series of SOAP (Simple Object Access Protocol) messages over UDP and HTTP(S). WSD for Devices provides a network plug-and-play experience that is similar to installing a USB device. Web Services for Devices also defines a security profile that may be extended to provide additional protection and authentication using device-based certificates.
Source: StackExchange thread
Windows Update tips
Sometimes a Windows Update issue will need to be resolved as as a prerequisite for a successful MapleLeaf2 or OpenVPN client installation.
Tips
Verify:
- Internet connectivity is working. Eg. you can load http://lxer.com (and don't get a captive portal popup if on a public network).
- The network you are on is not designated as a "metered connection" (Windows 8 and newer)
- The DrawBridge security certificate is installed if routed through a DrawBridge.
- There are no filter policies interfering: watch the Realtime Log Viewer.
- Verify you are on a supported version of Windows. As of this writing: Windows 10 and 11 are in-support.
- The computer is not compromised: Some viruses will block/damage Windows Update. If there's any question, run a virus scan from a reputable company, such as Malwarebytes or BitDefender. For some situations, you may benefit from running Norton's PowerEraser tool in "offline" mode where you boot to a secure environment and scan from there.
Tips for legacy versions of Windows
-
If running Windows 7; explore whether the system can be upgraded to 10 or 11. However, if that is simply not an option (eg embedded system), note that TLS 1.2 was not enabled by default and needs to be explicitly enabled for modern secure communication. Refer to this Microsoft Support doc: Update to enable TLS 1.1 and TLS 1.2 as secure default protocols in WinHTTP in Windows 7.
A system reboot is practically always required to make low-level TLS changes such as the above to take effect.
-
Is the Windows Update client too far out of date to even update itself? If so, check the update installation history, and then do some research to determine if there is a "service pack" or "roll-up" update to install that Microsoft made available. After installing that manually via a download from Microsoft, then see if the Windows Update client will fetch updates for itself.
-
Perform a reset of the full Windows Update stack, per this Microsoft article
-
Try stopping Windows Update Services and clearing the Windows Update download cache by doing this:
- Stop Windows Update Services. This can be done by running the following command (use command prompt in administrator mode):
net stop wuaserv - Rename the:
C:\Windows\SoftwareDistributionfolder to:C:\Windows\SoftwareDistribution.old - Start Windows Update Services. This can be done by running the following command (use command prompt in admistrator mode):
net start wuaserv - Reboot the computer.
- Stop Windows Update Services. This can be done by running the following command (use command prompt in administrator mode):
-
Windows 7 devices: Installing this Microsoft Update may improve searching for updates.
-
When updating a computer that is several years out of date, start with the oldest updates first: don't let it try to install all of them at once--deselect the newest updates and have it work on those first. Continue progressing through until you are current. While time consuming, carefully performing updates in-order does reduce dependancy issues.
-
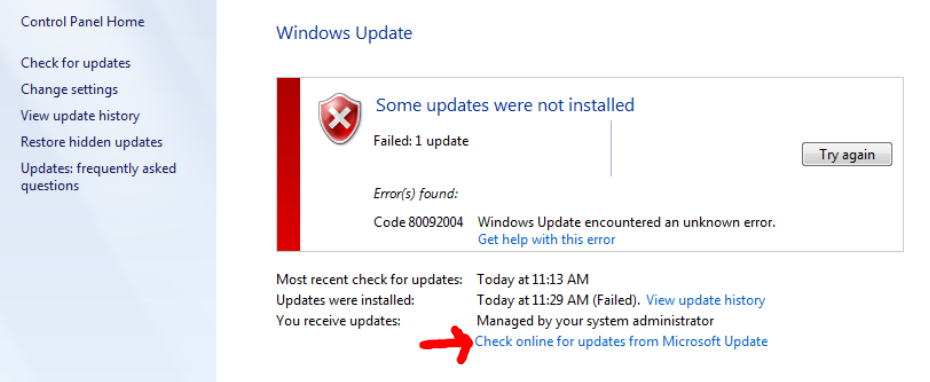
Is the computer connected to a domain? If so, the domain controller may be managing the updates, so any error messages you get on the client may actually be coming from the Windows Server. Windows 7 has an option available (at least in some cases) to connect to Microsoft directly for updates.
Diagnostic and Resolution Example from June 2020
Process followed on a Windows 7 laptop complaining about drivers/software not being signed (when it was known that the software in question was properly signed):
- Observed that the last time the computer had updated was in December 2014
- Attempted to check for updates, but this failed with an error message:
80244019. Finally figured out the domain controller issue mentioned above. Tried to see if the policy could be changed locally with Group Policy: No (needs to happen on the server) - Found this driver signing update, however the hotfix was no longer available (probably rolled into another update).
- Checked to see if Service Pack 1 was installed: According to Computer Properties, SP1 was installed
- Tried running the Windows Update troubleshooter linked above. Each time it would find errors, but could only fix some of them.
- Reviewed available Standalone Windows Update Agent updates
- Found this helpful HowToGeek article, which advises to first update the Servicing Stack and then to install the Convenience Roll-Up update linked in the article.
- After this, Windows Update was able to fetch updates for itself (when told to check directly with Microsoft).
Preparing your Windows Server for AD LDAPS access
We recommend using LDAPS for your Active Directory connection to ensure your user data is encrypted in transit on your network between your Active Directory server and your DrawBridge.
However, while Windows Active Directory Server listens on port 636, it will reject all requests unless a security certificate has been configured for it.
(It is Not nessesary to install an extra LDAPS function on your Windows Server to use the AD-LDAPS connection.)
Check if a security certificate has been configured
- Go to Start and open Run. Enter
mmcand click Run - Under the
Filemenu, clickAdd/Remove Snap-ins... - In the wizard, under available snap-ins, select Certificates, and click Add, then OK
- For the Certificates Snap-in, select
Computer account, and click Next - For the Select Computer options, ensure
Local Computeris selected, and click Finish - In the tree view on the left, under Certificates, expand out the Personal directory. If this directory, or a Certificates sub-directory is empty, the AD server doesn't have a security certificate it can use for the LDAPS connection. Proceed with the Setup steps below.
Set up a new CA and issue a security certificate
- Go to Server Manager, and click Add Roles and Features
- Click Next
- Ensure
Role-based or feature-based installationis selected, and click Next - Ensure
Select a server from the server poolis selected, as well as a server in the Server Pool list, and click Next - Select the box for Active Directory Certificate Services, and click Next
- Don't select anything under Features, and click Next
- Read over comments in AD CS, and click Next
- Select Certification Authority in Role Services, and click Next
- Optionally select
Restart the destination server automatically if required(or manually restart later), then click Install - After the installation is finished, click the link for Configure Active Directory Certificate Services on the destination server, and close the Add Roles and Features Wizard window.
- In the AD CS Configuration window, click Next to proceed with the credentials of the user you're signed-in as (must have Administrator permissions)
- Select Certification Authority under Role Services, and click Next
- Ensure
Enterprise CAis selected, and click Next - Select
Root CA, and click Next - Select
Create a new private key, and click Next - Select a minimum of
SHA256fort the hash algorithm, and click Next - Review the names suggested for the CA, and click Next
- Use the default validity period of 5 years, and click Next
- Review the database location, change if you wish, and click Next
- Review what will be performed, and click Configure
- It should report
Configuration Successful, and you can close that window - Next, go to the Start Menu, open Run, and enter
certmpl.mscand run it - In the Certificate Templates Console, right-click
Kerberos Authentication, and clickDuplicate Template -
Properties of new Template will appear. Make the following changes:
- General tab: set the Display Name to DrawBridge LDAPS
- General tab: select
Publish certificate in Active Directory - Request Handling tab: select
Allow private key to be exported - Subject Name tab: ensure
Build from this Active Directory informationis selected, as well as the checkbox forDNS name - Click Apply and OK.
- Close the Certificate Templates Console
- Go to Start, and open Certification Authority
- Right-click on
Certificate Templates, then underNew, clickCertificate Templates to Issue - In the Enable Certificate Templates wizard, select
DrawBridge LDAPSand click OK - Close the Certificate Authority window
- Go to Start, open Run, and enter
mmc, and Run - Under
File, clickAdd/Remove snap-in - In the Add/Remove Snap-in window, select Certificates, then
Add >, then click OK - Select
Computer account, and click Next - Select
Local Computer, and then click Finish - In the tree view on the left, expand the Personal folder
- Under the Personal, right-click on
Certificates, selectAll Tasks, then clickRequest New Certificate... - The Certificate Enrollment wizard will open, click Next
- Under the Certificate Enrollment Policy, ensure
Active Directory Enrollment Policyis selected, and then click Next - Under Request Certificates, select DrawBridge LDAPS, and click Enroll
- The wizard should support
STATUS: Succeeded, click Finish - That's it! If you opted to not automatically restart the server in step #9, restart the server now.