Enroll Apple Devices with Configurator App on iPhone
Directions for using Apple Configurator App to enroll devices into Compass/Orbit management.
- Prerequisites
- Apple Configurator App Setup
- Adding an iPhone or iPad
- Before you add a Mac
- Adding a new Mac (not set up or in-use)
- Back up your Mac with Time Machine
- Adding a Mac (currently in-use)
- Restore the Time Machine backup
Prerequisites
Requirements for Enrollment using Apple Configurator App.
Eligible Devices
You can add the following to Apple Business Manager using Apple Configurator on your iPhone, even if the devices weren’t purchased directly from Apple or an Apple Authorized Reseller or cellular carrier:
-
iPhone
-
iPad
-
Mac computers with with Apple silicon or Mac models with the Apple T2 Security Chip.
To enroll an older device refer to these instructions
30 Day Release period disclaimer
When a device is set up this way, it behaves like any other device already in Apple Business Manager, with mandatory supervision and mobile device management (MDM) enrollment. The user of that device then has a 30-day provisional period to release the device from Apple Business Manager supervision and MDM.
This 30-day provisional period begins after the device is successfully assigned to and enrolled in Compass' MDM service.
Minimum Requirements
To enroll Mac
- Mac running macOS 12.0.1 or newer
- iPhone with Apple configurator installed running iOS 15 or newer, or (Testing) iPad running iPadOS 16.4.1 or newer.
- Enrollment starts from the "Select your Country or Region" Setup assistant pane after factory reset.
While erasing all content and settings (factory reset) from the device settings, devices with an e-SIM already configured will ask whether or not to save that e-SIM. Saving the e-SIM at this point should allow the SIM to remain installed throughout the rest of the enrollment process.
To enroll iPhone
- iPhone running iOS 16 or newer
- iPhone with Apple configurator installed running iOS 16 or newer, or (Testing) iPad running iPadOS 16.4.1 or newer.
- Enrollment starts from the "Choose a Wi-Fi Network" Setup assistant pane after factory reset.
To enroll iPad
- iPad running iPadOS 16 or newer
- iPhone with Apple configurator installed running iOS 16 or newer, or (Testing) iPad running iPadOS 16.4.1 or newer.
- Enrollment starts from the "Choose a Wi-Fi Network" Setup assistant pane after factory reset.

Apple Configurator App Setup
Sign in to Apple Business Manager
After downloading the Apple Configurator app onto your iOS device:
- iPhone (running iOS 16 or newer) for iphone or ipad enrollment.
- iPhone (running iOS 15 or newer) for Mac enrollment.
- iPad (running iPadOS 16.4.1 or newer) for all Apple devices.
- Ensure that your devices are updated to iOS 17 and the Configurator App is updated to the latest version.
-
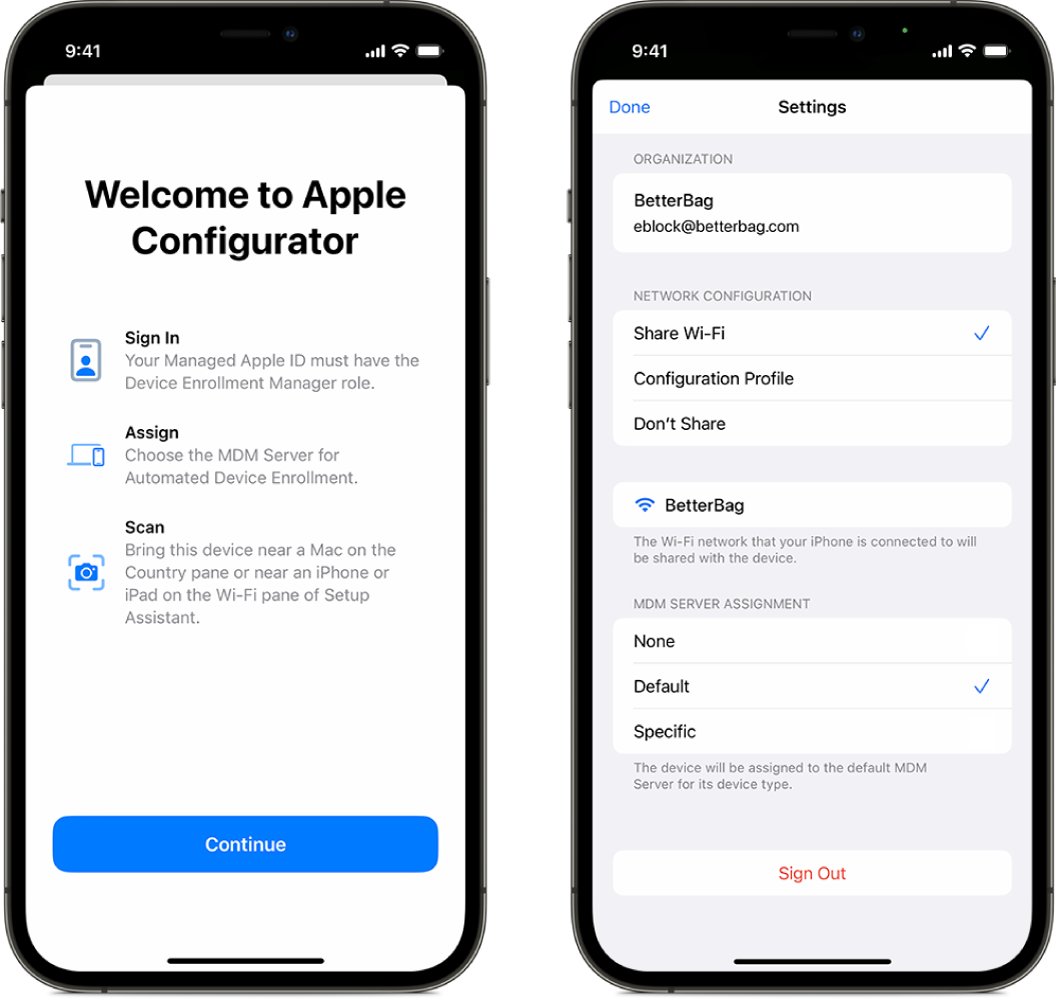
Make sure your iPhone can access the internet through a Wi-Fi network or a cellular connection, then launch Apple Configurator on your iPhone.
-
Enter your Managed Apple ID. You must have a role that allows Apple devices to be assigned to Apple Business Manager (ABM), such as Administrator or Device Enrollment Manager.
Note: This will be the same credentials you would use in Apple Configurator 2 on a Mac computer for authentication with the Compass ABM account when enrolling iPhone, iPad, or iPod.
If you do not have an Apple ID set up for enrolling devices and you are interested in enrolling devices for us call Compass Foundation at (856) 974-5335 for assistance with getting that set up.
-
Go to Apple Configurator > Settings, and make the following changes:
- Select the network configuration profile you want to use (You shouldn't need any profile)
- Select the MDM server assignment method:
- Choose
Specific:to automatically assign devices to a specific MDM server.- For iPad, iPhone, and iPod choose
Jamf-Crabapplefor Orbit Two and Three. - For ALL Orbit One and MacOS devices choose
Mosyle.
- For iPad, iPhone, and iPod choose
- Choose
Credits: Source of the majority of content in this article: Apple Configurator User Guide for iPhone
Adding an iPhone or iPad
Steps to add a new or erased iPhone or iPad:
In other words, you'll need to
- Turn off Find My iPhone or iPad (this requires the Apple ID password) (Settings > tap on iCloud banner with your name > Find My > turn off the switch for Find My iPhone/iPad
- Factory Reset the Phone (Settings > General > Transfer or Reset iPhone/iPad > Erase All Content and Settings > Continue > Erase iPhone/iPad
-
Start up the iPhone or iPad. It should be at the "Hello" screen.
-
Continue through the Setup Assistant, then stop when you see the Choose a Wi-Fi Network pane.
- Note: You must restart the iPhone or iPad if you go past the Choose a Wi-Fi Network pane.
-
Bring your iPhone with Apple Configurator app close to the iPhone or iPad, then do one of the following:
- Scan the image that appears in Setup Assistant.
- Tap Pair Manually in the lower-left corner of the Setup Assistant, then tap Manual Pairing in Apple Configurator app and enter the six-digit code that appears.
- Note: If Setup Assistant doesn’t show the pairing pane on the iPhone or iPad you want to add, return to the Home Screen on your iPhone, then tap the Apple Configurator app again.
- At this point the serial number and other information about the iPhone or iPad are uploaded to Apple School Manager, Apple Business Manager, or Apple Business Essentials.
-
Wait for the process to complete.
If you setup the Configurator App correctly and chose the correct MDM (available with iOS 17 or higher), you should be able to follow the instructions on the screen of the device that you are enrolling and skip steps 5-9.
With iOS 17 or higher you'll see an Erase iPhone/iPad button. Tap Erase iPhone/iPad and then go through the Setup Assistant pages. Do not transfer apps and data. Select "Setup Manually". Connect to WiFi. One of the next pages will talk about enrolling into Maranatha Fellowship Device Management. Follow the prompts until you get to the Home screen. Now you are done. A Compass Tech will need to finish up the enrollment.
-
Next tap Erase and Shut Down
-
The next step must be performed by a Compass Foundation Tech: contact Compass Foundation and wait for their response before proceeding.
-
Restart the iPhone or iPad and complete the device setup.
-
If you did not get the prompt to accept and install the management profiles from Maranatha Fellowship, factory reset the device again But DO NOT re-enroll with Apple Configurator app again at this point.
-
You should get the prompt to install management profiles during the setup sequence just after connecting to Wi-Fi.
Credits: Source of the majority of content in this article: Apple Configurator User Guide for iPhone
Before you add a Mac
Take these additional steps before you add a Mac:
-
Decide how you want the Mac to connect to the internet, then either create a configuration profile or gather the necessary adapters and cables.
-
Share the Wi-Fi network credentials (default method): This requires that the iPhone is connected to a Wi-Fi network with access to the internet. The Mac will use the same network credentials when it starts.
-
Use a network configuration profile: This requires that you create a configuration profile with a Wi-Fi or 802.1X payload containing the appropriate network credentials and saved in a location in the Files app. You can then configure it in Apple Configurator > Settings. See Create and edit configuration profiles in Apple Configurator in the Apple Configurator User Guide.
- Note: If necessary, you can add a certificate payload for use with Wi-Fi or 802.1X authentication to the configuration profile. See Certificates MDM payload settings for Apple devices in Apple Platform Deployment.
-
Connect the Mac to the internet using an Ethernet connection: This requires that the Mac is connected to the internet before assigning it to Apple Business Manager.
-
Credits: Source of the majority of content in this article: Apple Configurator User Guide for iPhone
Adding a new Mac (not set up or in-use)
If you’ve purchased a new Mac and haven’t yet started it up, you can begin.
-
If you’re adding a Mac portable, plug the Mac into a power source so it doesn’t go to sleep during the process.
-
If the Mac is connecting to the internet using Ethernet, plug in all necessary cables and adapters.
-
Start up the Mac.
-
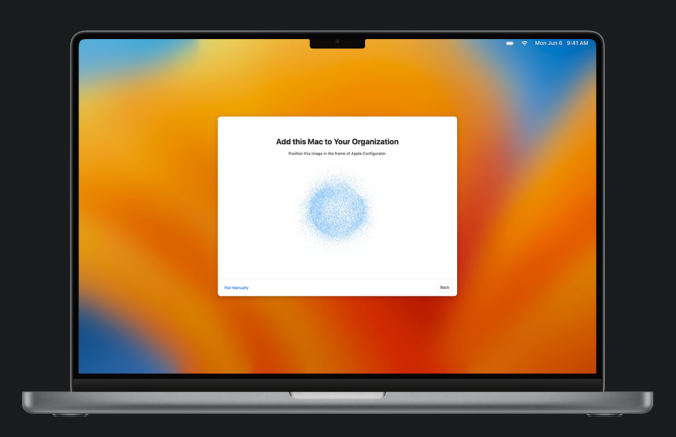
Select the language in Setup Assistant, click Continue, then stop when you see the Country or Region pane.
- Note: You must restart the Mac if you go past the Country or Region pane.
- Bring your iPhone close to the Mac, then do one of the following:
-
Scan the image that appears in Setup Assistant.
-
Click Pair Manually in the lower-left corner of the Setup Assistant, then tap Manual Pairing in Apple Configurator and enter the six-digit code that appears.

-
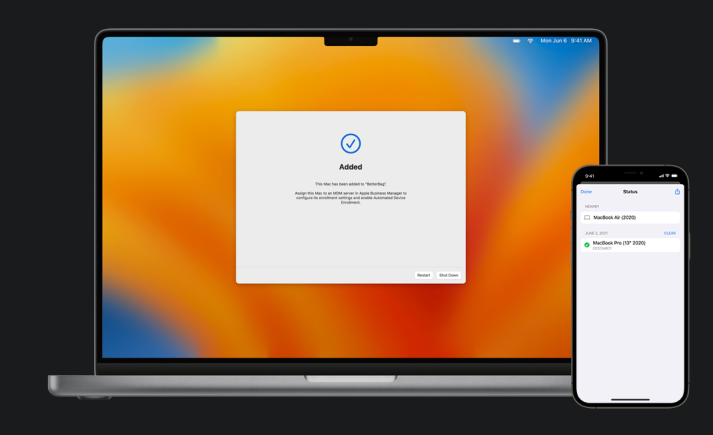
The serial number and other information about the Mac are uploaded to Apple Business Manager.
-
Wait for the process to complete, then click Shut Down to turn off the Mac.

-
The next step must be performed by a Compass Foundation tech: contact Compass Foundation and wait for their response before proceeding.
-
After you have direction from Compass to proceed, restart the Mac and complete the device setup.
-
During this process you should receive a prompt to install the management profiles. Accepting this installation will complete the enrollment, after which you may jump to step 12.
- If you did not receive this profile installation prompt go to step 10.
- Open the Terminal app on your mac and run this command.
sudo profiles renew -type enrollment
- You will be prompted for your password. This is the password you use to unlock your computer. Nothing will show as you type, just type the password and click enter when you are finished.
-
Now open the System Preferences and you should see in the lower right a Profiles option. Click on this and install the profiles.
-
At this point your computer, though it is managed, will be unfiltered. Next step: contact Compass Foundation to have the filter profile applied.
Credits: Source of the majority of content in this article: Apple Configurator User Guide for iPhone
Back up your Mac with Time Machine
Learn how to create a backup of the files on your Mac: Use Time Machine, the built-in backup feature of your Mac, to automatically back up your personal data, including apps, music, photos, email, and documents. Having a backup allows you to restore your Mac from a Time Machine backup if you ever delete your files or can't access them.
Connect a storage device to use for backups
Connect an external storage device to your Mac, such as a USB drive or Thunderbolt drive. Or learn about other backup disks that you can use with Time Machine.
- Use this storage device only as your Time Machine backup disk, not for storage of other files.
- Ideally, your backup disk should have at least twice the storage capacity of every disk or volume you're backing up. If your backup disk doesn't have enough storage space to contain a complete backup, Time Machine will let you know.
Select your storage device in Time Machine settings
When you connect the storage device to your Mac, your Mac might ask if you want to use it for Time Machine backups. If it doesn't ask, follow these steps.
- Open Time Machine settings:
- macOS Ventura or later: Choose Apple menu > System Settings, click General in the sidebar, then click Time Machine on the right.
- Earlier versions of macOS: Choose Apple menu > System Preferences, then click Time Machine.
- In Time Machine settings, select your external storage device as your backup destination:
- macOS Ventura or later: Click the add button (+), then follow the onscreen instructions.
- Earlier versions of macOS: Click Select Backup Disk, then follow the onscreen instructions.
- If the storage device contains Time Machine backups from another Mac, you might be asked to claim the existing backups so that they become part of the backups for this Mac. Or you can choose to start a new backup instead.
Make a backup
Back up automatically. After you select your storage device in Time Machine settings, Time Machine automatically begins making periodic backups.
Back up manually. To start a backup manually, without waiting for the next automatic backup, choose Back Up Now from the Time Machine menu in the menu bar.
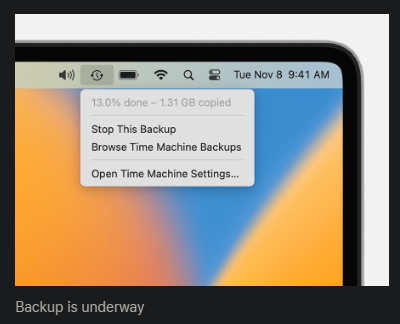
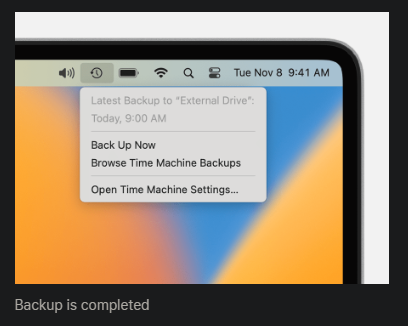
Check backup status. Use the Time Machine menu in the menu bar to check the status of a backup or skip a backup in progress. For example, if a backup is underway, the menu shows how much of it is done. When a backup is not underway, the menu shows the date and time of the latest backup.
Backup frequency and duration
Time Machine makes hourly backups for the past 24 hours, daily backups for the past month, and weekly backups for all previous months. The oldest backups are deleted when your backup disk is full.
Beginning with macOS Ventura, you can change the backup frequency: Open Time Machine settings, click Options, then choose a setting from the “Back up frequency” menu.
The first backup might take a long time, but you can continue using your Mac while a backup is underway. Time Machine backs up only the files that changed since the previous backup, so future backups will be faster.
Troubleshooting: If a Time Machine backup takes longer than you expect.
Learn more
- To exclude items from backups, open Time Machine settings, click Options, then click the add (+) button to add an item to be excluded. To stop excluding an item, select the item and click the remove (–) button.
- If you back up to multiple disks, you can press and hold the Option key, then choose Browse Other Backup Disks from the Time Machine menu.
-
Learn about other ways to back up and restore files.
- Information about products not manufactured by Apple, or independent websites not controlled or tested by Apple, is provided without recommendation or endorsement. Apple assumes no responsibility with regard to the selection, performance, or use of third-party websites or products. Apple makes no representations regarding third-party website accuracy or reliability. Contact the vendor for additional information.
Credits: Content from Apple Support documentation.
Adding a Mac (currently in-use)
If you want to add a Mac that’s currently configured, you MUST first erase all content and settings.
Important: All your data will be erased. Make sure you have an up-to-date backup of your data because it will all be erased!
-
If you’re adding a Mac portable, plug the Mac into a power source so it doesn’t go to sleep during the process.
-
If the Mac is connecting to the internet using Ethernet, plug in all necessary cables and adapters.
-
Do one of the following:
- If your Mac has macOS 13 or later: Choose
Apple menu > System Settings, clickGeneral, clickTransfer or Reset, then clickErase All Content and Settings. - If your Mac has macOS 12 or earlier: Choose
Apple menu > System Preferences. Then in the menu bar chooseSystem Preferences > Erase All Content and Settings. - If your Mac has a T2 security chip you will need to set the Security Utility to Full Security.
- If your Mac has macOS 13 or later: Choose
Info: The erase process includes signing out of the Mac with your Apple ID, so be sure to have the credentials available.
-
In Erase Assistant, enter your administrator information.
- If your Mac has multiple user accounts, click the arrow next to your account name to review the items.
-
Click Continue, then follow the onscreen instructions.
- Note: If your version of macOS has been modified, Erase Assistant can’t erase your Mac and displays an alert indicating you need to first reinstall macOS. For more information, see Erase and reinstall macOS.
-
Wait for the Mac to restart.
- To connect to Wi-Fi click the Wi-Fi symbol in the upper right corner of your screen and then select the connection you want to use. You will then be prompted for the Wi-Fi password.
- If an OS reinstall is needed it will do that at this point and depending on your internet speed this may take a bit of time. See Note above.
-
Select the language in Setup Assistant, click Continue, then stop when you see the Country or Region pane.
- Note: You must restart the Mac if you go past the Country or Region pane.
-
Bring your iPhone close to the Mac, then do one of the following:
- Scan the image that appears in Setup Assistant.
- Click Pair Manually in the lower-left corner of the Setup Assistant, then tap Manual Pairing in Apple Configurator and enter the six-digit code that appears.
- The serial number and other information about the Mac are uploaded to Apple Business Manager.
-
Wait for the process to complete, then click Shut Down to turn off the Mac.
-
a. If you set the MDM server in the Apple Configurator app proceeds to step 11a.
b. If did not set the MDM server the next step must be performed by a Compass Foundation tech: contact Compass Foundation and wait for their response before proceeding.
-
a. Restart the Mac, proceed through the device setup, and go to step 12.
b. After you have direction from Compass to proceed, restart the Mac and complete the device setup.
-
a.You should receive a prompt during the setup to install the management profiles. You will need to accept this installation which will complete the enrollment.
b. If you did not get this prompt, open terminal and run this command
sudo profiles renew -type enrollment. You will be asked for the device password. When entering, it will not show so just enter the password and click enter when complete. -
Now your computer, though managed, is still unfiltered. Next step: contact Compass Foundation to have the filter profile applied.
-
You may proceed with the backup restore at this point.
Credits: Source of the majority of content in this article: Apple Configurator User Guide for iPhone
Restore the Time Machine backup
- After enrolling the Mac, set it up and bring it to the Home screen.
- Check to make sure it is running macOS 13.x or higher
- If needed, update to 13.x before doing the restore
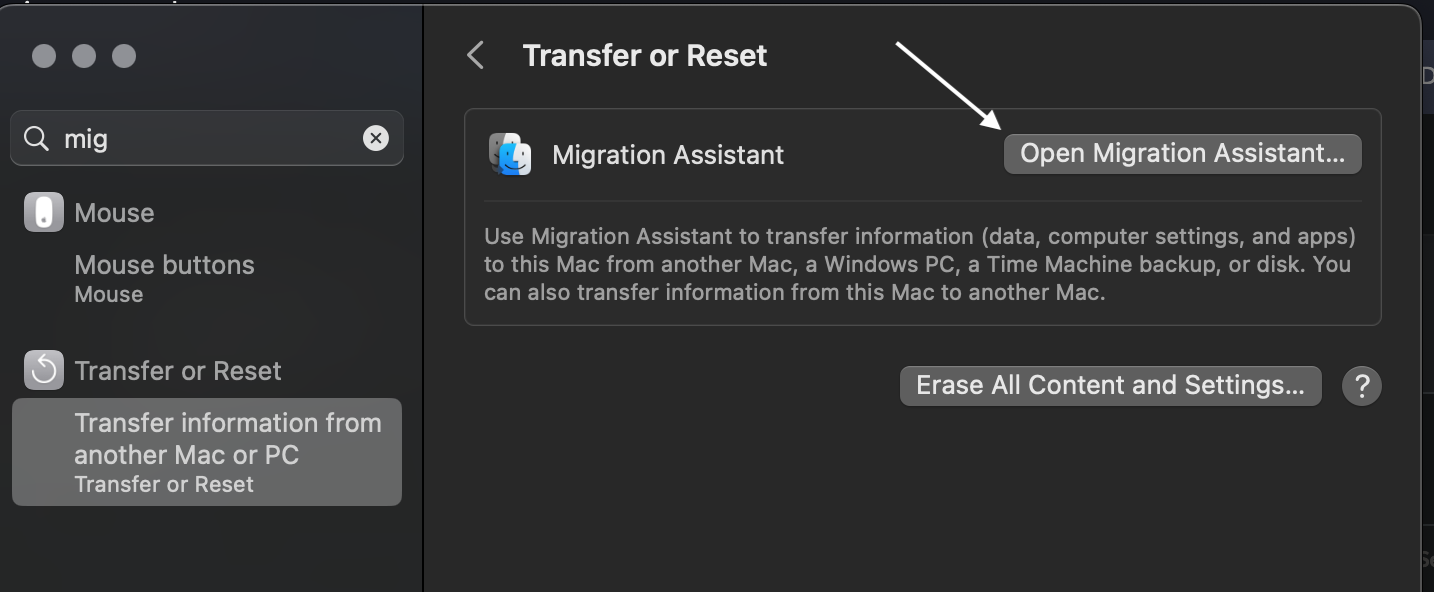
- Once is has been updated, go to System Settings and search for
Migration Assistantand just follow the prompts